
You can also read this post in Hindi.
At the time of constructing the bathroom, many homeowners repent later due to lack of knowledge and planning.
If you are a home owner and planning to remodel a toilet/bathroom, the below points will help you to make it more efficient.
1. Minimum Toilet Size

First thing is size, whenever you plan for a toilet, always keep in mind the size.
Minimum size for Indian commode or western commode should be
4’0″ x 3.6″ (Length x width)
It is a convenient space for a normal toilet.
If a person is specially abled then plan it as per his/her convenience.
For example, use western commode than Indian commode.
Install grip handles on both sides of the commode to let them sit and stand up.
It can be also used in toilets where aged people or heavy weight people live.
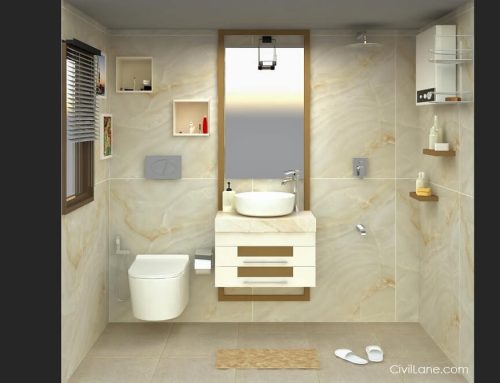
2. Minimum Bathroom Size

If you are planning to build only bathroom, then it’s size should be 5’0″ x 4’0″ (Length x Width)
This size of the bathroom is convenient for taking a bath and washing clothes.
In the bathroom also, if there is a specially abled person or aged family members then install grip handles near shower and door.
3. Minimum attached toilet/bathroom size

If you want to make combined (attached) toilet and bathroom then minimum size should be 7’0″ x 4’0″ (Length x Width)
In the attached bathroom, you can plan Wash Basin, Western or Indian commode and shower area easily.
It is the best plan if you have a shortage of space. In this way you can save money by planning an attached washroom.
Note: If you are planning only one single attached bathroom and family members are more than 2 persons then kindly avoid it. Rather than, make a separate toilet and separate bathroom.
Reason is, if family members are more than two, then one will have to wait to using bathroom as well as toilet. Which will be quite annoying in the morning.
4. Minimum Toilet & Bathroom Height size

If you are planning a toilet/bathroom from scratch and have a good scope of height then you can keep a minimum 7 feet of height and maximum you can keep 9 feet. In 9 feet of height you can keep a 7 feet bathroom ceiling and in another 2 feet you can plan a storage space, which you can access from outside of the bathroom door.
5. Minimum Bathroom Window Size

Keep minimum 1’6″ x 2’0″ (Width x Height) size for toilet & bathroom window. For proper ventilation and to let natural sunlight enter into the bathroom.
6. Bathroom flooring selection

Do not select glossy and slippery tiles for the bathroom flooring.
Select rough and anti-skid tiles for bathroom and toilet.
Also avoid big size tiles for small bathrooms. It wastes your tiles and money.
7. Bathroom shower seat

It is a very basic point, which many homeowners don’t know.
Elderly people can not take a bath by sitting on the floor or standing and for parents also it is a little difficult to give bath to their kids.
You can simply install a bathroom shower seat which fits in a very small space and it is foldable. After taking a bath you can just fold it up back, and it can take up weight up to 150-200 kg.
For bathroom flooring, 1’0″x1’0″ size is the best choice.
8. Keep Wet & Dry Area Separate
In the below image we will understand how to plan wet and dry washrooms.
In the first image, you can see that there is a wash basin at the entrance then shower area and then WC (water closet).

Which is a wrong placement, because people use the WC more frequently than shower area.
So, whenever you use the WC, you have to pass through the shower area which is a wet area. Every time your foot will get wet and chances of getting slipped and fall down.
In the second image, you can see that we have changed the placements. Basin is at the same place, but we shifted shower area to the end with a glass partition and WC shifted to the middle.
This way you can use the WC, which is now a dry area of the bathroom. You don’t need to pass through the wet area now, lees chances of getting slipped.
9. Bathroom Floor Level

Wet area flooring should be down than dry area, so that water will not get spread in the dry area.
Bathroom flooring should go down from 0.5 inch to 1 inch from room flooring.
10. Toilet Seat Selection

Before constructing a bathroom, choose what type of toilet seat you want to install, Indian or wall mounted WC?
Because, plumber will get to know how to lay internal piping accordingly.
For wall mounted WC, drainage pipe will be laid on from the wall and flush tank installed inside the wall.
Where in Indian commode, drainage pipe will be laid on from the floor.
If you decide later on then you will have to break the brick work, which will consume time and waste you money.
So it is necessary to decide in prior, which toilet seat you want to use.
Wall mounted WC is better for cleaning and aesthetic point of view.
11. Bathroom Ventilation

It is necessary to plan for proper ventilation in the toilet and bathroom.
There are many disadvantages, if ventilation is not properly planned.
1. Bad odor will not evaporate and it will enter into the room when opening the door.
2. Spending more than minutes in the summer season, one can fall down due to suffocation.
3. Bathing with hot water will create fog in the bathroom where it is difficult to breath for elderly people as well as kids.
4. If you are using a gas geyser without ventilation then it is very harmful, one can die inside the bathroom.
5. You will have to turn on the light every time you use the bathroom , due to lack of natural sunlight. Which increases energy bills.
So, plan a well ventilated window in the bathroom and also install an exhaust fan if using electric geyser or gas geyser etc.
12. Bathroom Waterproofing

Bathroom waterproofing is a must, many people ignore it and regret later.
In the bathroom, it is necessary to get water proofing done on the floor and also on the wall. So that due to the moisture of the water, dampness does not get into the other wall. And if you are living in an apartment then this is even more important so that water does not leak on the floor below you.
13. Bathroom Concealed Piping Photo

At the time of bathroom construction, before plastering concealed piping and applying tiles, take a photo of every wall.
So that if you want to drill or make a niche after applying tiles, you know where the pipes are laid in which directions.
And in future if major or minor repair work is there, you can show it to your plumber for his reference.
14. Testing

After laying concealed piping, you should close the face of the pipes with an end cap. Otherwise at the time of plastering the wall, cement can enter into those pipes and it can create problems of choking and slow water force.
And after installing end caps, pour water into pipes fully. If there are any leakages you can identify it before applying plaster and tiles.
This practice can save your money. Because if you identify leakage after installing tiles, then it can make a huge loss.
So this was tips and points to be taken care of at the time of construction of the bathroom. We hope that we have educated you through our informative post.
If you liked this information then kindly like, comment and share with your friends and family members for their knowledge.

Leave a comment